Contact us today for a free consultation! Call 888-WE-MELT-YOU or click here to email.

Author Archives: Lauren Headley

July 4 Parfait 1

Friendly Feasting: Red, White, and Blue Parfait

Happy Birthday, America! I admit it: I’m a junkie for holidays, themes, etc. so I just HAD to post something red, white, and blue for this week’s recipe blog. However I wanted something quick and easy because you’re likely busy hosting or attending events and have enough things to do (OR you’re thoroughly enjoying a lazy weekend which is just as important to preserve!). Why not take the simple chia seed pudding recipe I’ve already posted and add some red and blue to the mix!


Fourth of July Parfait

Start with this chia seed recipe:

Chia Seed Pudding http://www.foodandwine.com/recipes/chia-seed-pudding

  • 2 ½ cup almond milk
  • 3 Tbsp sf syrup
  • ½ cup chia seeds (3 oz)
  • ½ tsp lemon zest

In 1 quart jar, combine milk and syrup. Close jar and shake. Add seeds and zest. Close and shake again. Refrigerate until very thick and pudding like – 4+ hours or overnight. Shake or stir occasionally.

Then use blueberries and either strawberries or raspberries to add festive blue and red. I like to layer blueberries, pudding, raspberries from bottom to top so that the finished product runs red, white, and blue top to bottom! Make individual parfaits or one larger bowl to serve as a pretty centerpiece. Serving size is based on fruit – ½ cup fruit = 1 carb.

I used a champagne flute for my parfait (~1 cup total). This recipe would make enough pudding for about 8 of these small parfaits. Using more fruit would help with the layers look - the pudding really worked into nooks and crannies!

July 4 Parfait 2

Enjoy the holiday weekend, but don’t forget that you can still celebrate on plan! Grill up chicken breasts or turkey/chicken dogs or burgers. Grilled veggies or meltdown-friendly side salads round out the meal. Then dive into this parfait or other fruit-based dessert for a light and refreshing finish! Feast to America, feast to your health, and as always…FEAST ON!!!

~Coach Lauren

Double Chocolate Cookies

Friendly Feasting: Double Chocolate Cookies

Today’s June of Chocolate recipe is for cookies. Mmmm! Cookies are such a great option when you want a fast treat. Most basic recipes just require a quick mix of ingredients by hand while the oven preheats and much less time in the oven than brownies or cake. One of the things I like about this recipe is the use of almond butter, which I think gives a milder nut flavor to recipes than peanut butter. I know; I’m weird. I don’t like pb ruining my chocolate. However, if you’re a fan, feel free to sub pb for the almond butter!


Double Chocolate Cookies http://detoxinista.com/2012/12/double-chocolate-cookies-grain-free/

  • ½ cup almond butter, may need warmed for easy stirring
  • ¼ cup unsweetened cocoa powder
  • ¼ cup sugar-free syrup
  • ½ egg
  • ¼ tsp salt
  • 1 tsp vanilla
  • ¼ tsp baking soda
  • ¼ cup sugar-free or unsweetened chocolate chips, omit on a strict plan

Preheat oven to 350. Line baking sheet with parchment paper or Silpat. Combine all ingredients into a smooth/sticky batter. Drop onto sheet 2” apart. (You can mix in chips or top drops with them, if using. I like to just stick 2-3 on top of each cookie for a little something extra but kept in thoughtful moderation. This also lets me add a few chips to some but not all of the cookies). Bake 8-9 min or until firm. Cool 10 min on pan then remove from pan to cool completely. Makes 4 fat servings.

Are you wondering about that ½ egg? This is a halved recipe that called for a full egg. You could try using a full egg – I’ve done that now and again in a halved recipe without issue. You could scramble an egg in a small bowl and use half of the mix then use the other half for something else or just throw it away. Another option would be to try a 2-3 Tbsp of liquid egg whites.

As always, remember that even Meltdown-friendly desserts should be eaten in moderation. This is not an option to eat 2-3 times a day at snacks, but something to eat one serving of now and again (or even just a half serving!) when a sweet craving hits. If you don’t trust yourself with cookies, halve the recipe again so there are only two servings. One for today and one for tomorrow or the next day; then they’re gone.


I hope you enjoyed this month’s variety of chocolatey options! Keep your eyes on the blog for what July has to offer, but until then, feast ooey, feast gooey, and as always…FEAST ON!!!

~Coach Lauren

Mint Choc Tofu Pie 2

Friendly Feasting: Mint Chocolate Fudge Tofu Pie

Continuing with my June of Chocolate, today’s dessert is an example of one of my attempts with tofu. If you’re ready to give tofu a try or are a seasoned veteran tofu eater, give this one a whirl when you can splurge a little.

Mint Chocolate Fudge Tofu Pie http://chocolatecoveredkatie.com/2012/03/14/mint-chocolate-fudge-pie/

  • 3 oz pack tofu–MoriNu silk/firm best
  • 1 tsp cocoa powder
  • 1 tsp pure vanilla extract
  • 2 Tbsp almond milk
  • scant 1/8 tsp salt
  • 1/8 to 1/4 tsp pure peppermint extract (start with 1/8 and add more if desired)
  • 8 oz sugar-free chocolate chips
  • 2-3 Tbsp sugar-free syrup

Mint Choc Tofu Pie

Melt chocolate (either on the stove or in the microwave), then throw everything (into a food processor and blend until super-smooth. Pour into a prepared pie crust, if approved, or serve in bowls. Fridge until chilled. This gets firmer and firmer, the longer it sits. (It’s firmer if you use firm tofu and more like mousse pie if you use silken.)

The chocolate chips in this, even being sugar free, add a ton of calories (8 oz bag = 1,050) and other less desirable “extras” so be sure to only use this recipe as a splurge in moderation or take to a pitch-in with other adventurous eaters. Feel free to halve the recipe. A lower-calorie suggestion would be to sub all or some of the chips with Walden Farms Chocolate Syrup. If you’ve not tried WF products, be wary – they can be sickeningly, artificially sweet so I only remotely like a few of the products, and I couldn’t just eat them on their own. I don’t normally promote their use; however, the chocolate syrup might be a great sub in this recipe.

Tofu counts on the plan as protein and/or veggie, so as a veggie, this could be added anywhere. The only concern is the sugar-free chips to use in moderation (small slice/scoop!) but if you use Walden Farms, they add no calories. Feast with mint, feast with tofu, and as always…FEAST ON!!!

~Coach Lauren

No Bake Choc Chip PB Balls - CCK

Friendly Feasting: No-Bake Chocolate Peanut Butter Bites

I don’t suppose I’m the ONLY one who suddenly gets hungry or has a craving and just wants to reach into the cabinet or fridge and grab a thought-free snack? One way to combat those tricky moments is to ensure you have healthy choices on hand. Before I get into recipes, try these tips:

  • Best advice: don’t bring junk food into the house, but if you “have to”…
    • Put chips, candy, and other junk food in a hard-to-reach cabinet
    • Put junk in a locked area that you don’t have a key to
    • Buy things that are less tempting to you – Twizzlers aren’t at all a temptation to me like, say, KitKats! (I use this tip every Halloween!)
  • Keep fresh fruit on the counter, in the center of the dining room table, or at the front of the fridge so it’s the first thing you see
  • Have fresh veggies available – peel and cut some after purchase if necessary so they are always ready to eat
  • Instead of a candy jar, set out a jar of unsalted nuts for snacks and guests
  • Keep a water pitcher or filter in the fridge so cold water is always an option. Jazz it up with an infusion of fruit or cucumber slices

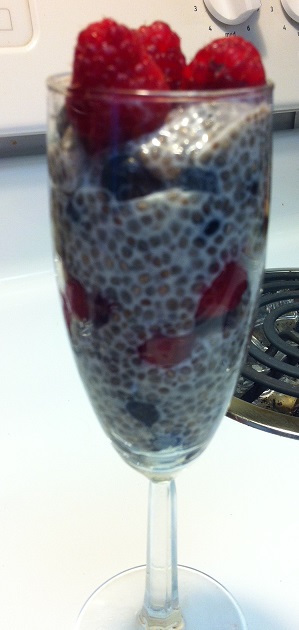
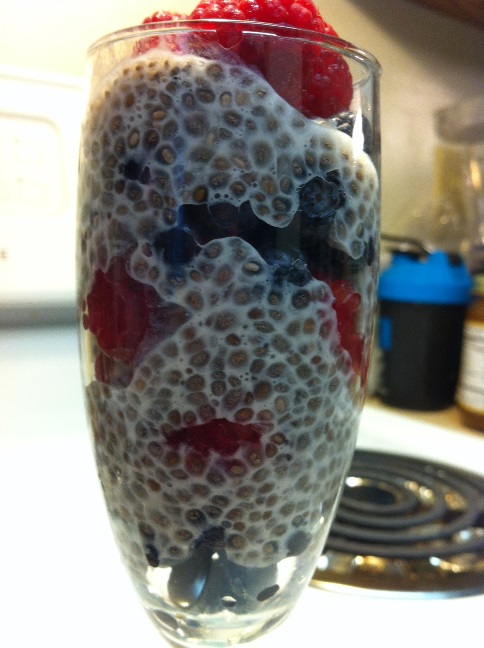
In addition to these tips, having some bite-sized items on hand may help. Whip up a quick recipe like the one below. The key is to grab 1-2 bites as needed, not eating the whole batch!

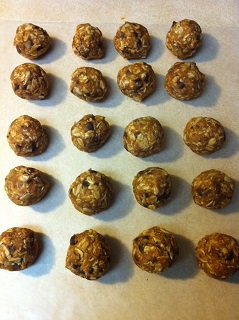
No-Bake Chocolate Chip Peanut Butter Balls http://chocolatecoveredkatie.com/2012/08/27/chocolate-chip-peanut-butter-balls/

  • ½ cup rolled oats
  • ½ cup natural peanut butter
  • Stevia drops to taste or 2 Tbsp+2 tsp sugar-free syrup
  • 2 Tbsp protein powder
  • 1-2 Tbsp sugar-free chocolate chips* – optional, in extreme moderation, not while on a structured plan

Combine all in small bowl and mix (pb will need to melt a little to use). Roll into balls and store in an airtight container. Try subbing the chocolate chips for raisins or a type of seed or try rolling in a mix of unsweetened cocoa powder and a little sweetener. Makes 4 fat servings, each with ½ carb, so L0-1 only; however, a couple of these is a better choice in a moment of weak willpower than potato chips or a candy bar!

Here are some variations:

Chocolate PB Protein Balls http://www.sheknows.com/food-and-recipes/articles/1032363/protein-powder-recipes

  • ¼ cup pb
  • ¼ cup sf syrup
  • 1 tsp vanilla extract
  • 1 cup oats or oat flour (process oats into a flour consistency)
  • 2 scoops chocolate protein powder
  • Pinch salt

In microwave save bowl, warm pb, syrup, and vanilla for 45 sec or until runny. In large bowl, mix oats/flour, protein powder, and salt. Pour warm pb mixture into dry ingredients and mix well. Roll into balls and place on plate lined with wax paper. Chill 1 hr to help them firm up. Store in an airtight container in the fridge. Makes 2 carb/protein servings each with ½ fat.

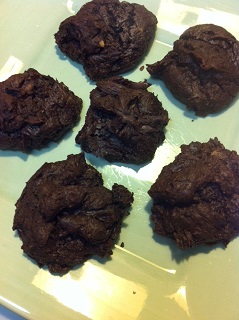
Peanut Butter Bliss Balls http://chocolatecoveredkatie.com/2015/02/23/peanut-butter-bliss-balls/

  • ½ cup natural pb
  • 2 Tbsp applesauce,+1 Tbsp if needed
  • ¾ tsp vanilla extract
  • 3 Tbsp flour (spelt and oat definitely work)
  • 1/3 cup Splenda (or less Stevia)
  • ¾ tsp baking soda
  • 1/16 tsp salt
  • optional, raisins

Line large plate/tray with parchment paper, and clear space in your freezer. If needed, gently warm the nut butter until stir-able, then measure it into a large bowl. Stir in applesauce and vanilla. In a small bowl, stir together all remaining ingredients; then add them to the wet mixture. Stir until evenly mixed. Form balls with a cookie scoop; then place balls on the parchment-lined plate. (If the dough is too soft, freeze until firm enough to form balls.) Freeze the balls a few hours until they are firm enough to handle without being sticky, then transfer to a bag or container, and store in the freezer. To bake, fridge balls 1+ hr then bake 8 min in pre-heated 350 degree oven. Let cool 5 min before removing from tray. Store in a plastic container to maintain softness. (Makes 4 fat servings, each with ~½ carb, more w raisins)


We all know what it’s like to want something “NOW” so make it easier on yourself by being prepared with these guilt-free solutions. Feast on one bite, feast on two bites, and as always…FEAST ON!!!

~Coach Lauren

Fudge Daddy Brownies

Friendly Feasting: Fudge Daddy Brownies

Bootcamp finale is approaching! This means many things, including:

  • Final weigh-ins and new pictures!
  • Lots of bootcampers trying to figure out their next steps!
  • Potential for a return to “how you used to eat” - use my blog for support to keep you going!
  • I have more flexibility in what I blog!

During bootcamps I post recipes that fit well for the upcoming week’s food plan. A lot of the recipes I share will fit on any plan or day, maybe with a bit of tweaking. No promises but I’m thinking this may be a chocolate-filled month. Now’s the time I can post things that I wouldn’t necessarily recommend during bootcamps due to extra ingredients or the potential for overeating (even approved desserts should be in moderation!). So current bootcampers, make a note to check this out after Sunday!


Fudge Daddy Brownies http://chocolatecoveredkatie.com/2011/06/10/im-obsessed-with-this-dessert/

  • ¼ cup unsweetened cocoa powder
  • ½ cup almond flour
  • ¼ tsp baking powder
  • ¼ tsp salt
  • ½ cup Splenda
  • 3 tbsp soft tofu or firm or lite firm (don’t let this deter you – see below!)
  • 1/3 cup pumpkin***
  • 2 tbsp coconut oil
  • 2 tbsp almond milk
  • 1 tsp pure vanilla extract

Combine dry ingredients (all through Splenda), and mix very well. In a blender, combine wet ingredients and blend until smooth. Pour wet ingredients over dry and stir, then pour into a 4×6 oiled pan for regular brownies or mini muffin tins for brownie bites. Cook for 12-18 min at 325 F. The blogger recommended not eating them for at least an hour after baking as they’ll taste sweeter in time and added this note…Fudgy variation: If you want them extremely fudgey (as in “so gooey you need a fork to eat them”) cook batter for 8-10 min. Then put pan in fridge to cool for 3+ hrs. Makes 3 fats (consider eating it as 6 half fat portions to limit the Splenda and extras).

Tofu – I’ve been experimenting with tofu recipes lately so having a few tbsp on hand wasn’t too hard for me, but I honestly wonder if it’s necessary or could be subbed with water or almond milk. It’s a pretty small amount and I don’t know why it’s in there other than perhaps to add a smidge of protein?

*** This recipe called for applesauce which I subbed with canned pumpkin because while pumpkin is a carbier veggie best eaten at a carb meal, it’s technically a veggie, so my swap makes this L2-4 friendly. However, as someone who’s just starting to tolerate the taste of pumpkin, this was WAY too pumpkin-y for me so I tried it again with applesauce. If you love pumpkin you’ll probably thank me for this swap! If you’re in a program (bootcamp, individual meltdown, Accel program, etc.) and use applesauce, best to have this at L1’s protein/carb/fat meal after a protein/veg main dish and you could add perhaps a half carb more like ¼ cup of fruit or brown rice. For those wondering why on earth this recipe has applesauce or pumpkin in the first place: these items are often swapped in recipes in place of butter or oil to lighten their fat content significantly! This particular recipe has plenty of fat as it is made with almond flour and still has some oil, but these fats are the healthier types and better for the bod!


Ok my melting buddies, that’s it for today. Give this recipe a whirl and maybe you’ll find your own spin to put on it! Until next week, feast with pumpkin, feast with applesauce, and as always…FEAST ON!!!

~Coach Lauren


Stuffed Pepper - rice, ground meat, veg

Friendly Feasting: Stuffed Peppers and Zucchini Boats

This week’s blog started with a recipe I just threw together myself. I’d seen stuffed peppers and thought they sounded good so I gave them a whirl. I figured it was pretty simple…brown up meat and sauté veggies together with whatever else you want. Fill peppers and bake until the peppers get soft:


Simple Stuffed Peppers (Lauren)

  • 4 bell peppers, seed and halve stem to bottom or just cut tops off
  • 1 lb ground turkey/chicken, brown and drain
  • 1 cup cooked brown rice
  • No-salt-added diced tomatoes, without liquid unless you want a soupier mix
  • Mushrooms, onions, other veggies of choice
  • 1 can diced green chilis
  • 2 tsp cumin, 1 t chili powder

In a skillet, sauté veggies and tomatoes. Add and brown meat. Mix in rice. Add seasonings to taste. Scoop mixture into pepper halves. Place peppers on baking sheet (in mini-loaf pan). If you have leftover meat mix, just put it in the pan around the peppers. It can be eaten on the side, as extra, or used later to top salad or something. Bake at 350-375 for 45-60 min or until peppers are tender. This recipe makes 4 protein/carb servings each with about 4 oz meat and ¼ cup of rice so you could have two peppers on L1-3!

Get creative with your filling. Try quinoa instead of rice. Not a carb meal or on Prime? Just omit the grains; I’ve made this plenty of times with just meat and veggies as stuffing. Want it to have a cheesy flavor? Use 2-4 Tbsp of nutritional yeast flakes in the mixture and/or sprinkled on top. The green chilis and spices I used give this a Mexican flare but if you want to go Italian, use oregano, garlic, basil, etc. Anything cut up small will work in the filling too.

I did have one issue…

…but a coworker had an answer. I was finding a fair amount of liquid in the pan after cooking. She used the tip found with this recipe http://carmenskitchen.blogspot.com/2012/09/stuff-it-low-carb-cheesey-stuffed.html and simmered the peppers in boiling water for 5 min before stuffing and baking. Not only did she not have a lot of excess water in her finished dish, but this recipe only requires 12-15 min of baking because the peppers are already partially cooked. I will definitely use this trick next time!


Zucchini Boats

Variation: Stuffed Zucchini Boats

Cut 2 large or 4 medium zucchini (larger ones can get bitter) lengthwise from step to tip. Scoop out the seeds and discard. Scoop away some of the zucchini flesh leaving about ¼” edge, just enough to be stable. In a large pan, similar to the stuffed pepper process, sauté your favorite veggies including the zucchini flesh, and then brown ground turkey/chicken. Stir in 1 cup or more of no-sugar-added spaghetti sauce or even just no-salt-added tomato sauce. Season to taste and add a little Parma! or nutritional yeast flakes. Fill the zucchini halves, place on a baking sheet, and bake as above until zucchini is tender. I wonder if using my coworker’s technique above would be advantageous or not. The simmering may soften the boats too much to where they won’t hold up.


Too much work with the boats? Annoyed the bell pepper tips over or is hard to eat without it caving? If you don’t care about presentation, just dice the pepper or zucchini and add it to the mixture to eat more like a casserole!


As summer approaches and we’re surrounded by goodies at the farmer’s market and even in our local grocery stores or backyard gardens, make use of these delicious vegetables in new and creative ways – more than just add-ins, they can be the bowls! Feast stuffed, feast fresh, and as always…FEAST ON!!!
~Coach Lauren

Asparagus w Balsamic Tomatoes

Friendly Feasting: Asparagus with Balsamic Tomatoes

I really do enjoy asparagus, even though I was in college before a friend introduced me to them. My go-to preparation is grilling them on my indoor grill because it’s the fastest prep method and requires no oil or anything to make them yummy. Roasting asparagus is great but definitely takes time to heat up the oven and get the veggies roasted to a sweet deliciousness.

One day I was having a friend over and planned to use up a bunch of asparagus I had in the refrigerator. I happened to have a large tub of grape tomatoes on hand and thought I’d give this recipe a whirl. It created quite a pretty dish to serve and took no time at all!

Asparagus with Balsamic Tomatoes http://www.myrecipes.com/recipe/asparagus-with-balsamic-tomato-50400000111098/

  • 1 pound asparagus, trimmed
  • 2 tsp extra-virgin olive oil
  • 1½ cups halved grape tomatoes
  • ½ tsp minced fresh garlic
  • 2 Tbsp balsamic vinegar
  • ¼ tsp salt
  • ½ tsp black pepper

Cook asparagus in boiling water 2 min (until crisp-tender). Drain. Heat oil in a large skillet over medium-high heat. Add tomatoes and garlic; cook 5 min. Stir in vinegar; cook 3 min. Stir in salt. Arrange asparagus on a platter; top with tomatoes. Sprinkle with pepper. Makes 2-4 servings, depending on how much you like asparagus! Add this veggie side to any snack or meal.

For those less experienced with asparagus, you always want to “trim” them. In essence you’re removing the “woody” part at the end of each stalk – about the bottom third. Asparagus will naturally snap in the right place so I generally hold a handful over my trash can, snap off the ends of several at once into the trash, and continue. You can also snap off one end to get an idea of the approximate place, and then line up your asparagus spears and use a knife to cut them all at that length, which will yield more uniformly sized spears.


A dish pretty enough for company but easy and fast enough for the family or even just yourself! Feast in a snap, feast after making a snap, and as always…FEAST ON!!!

~Coach Lauren


Mexi Spag Squash Pie 1

Friendly Feasting: Spaghetti Pizza Pie (and bonus 2nd version)

Today I’m thrilled and excited to present a recipe (plus a spin-off of my own) that Trish initially shared with bootcampers over a year ago. Despite not being terribly creative myself, I’d had the same idea/goal but with poor execution (see my former blog link below). This recipe however was JUST what I wanted and is really quite amazing! HIGHLY recommended!


MD Friendly Spaghetti Pizza Pie (http://paleomg.com/almost-5-ingredient-pizza-spaghetti-pie/)

  • 1 large spaghetti squash
  • 1 lb spicy turkey sausage, remove casings (or ground turkey/chicken)
  • ½ diced yellow onion
  • 1 cup no-sugar spaghetti sauce*
  • 1 tsp dried basil (I generally just add a bunch of Italian seasoning)
  • Salt and pepper to taste
  • 2-3 whisked eggs
  • Optional pizza toppings (think diced bell pepper and mushrooms, maybe artichokes or black olives, which will add a little fat)

Preheat oven to 400 degrees. Cut squash lengthwise and place cut side down on baking sheet and bake 20-25 min (or see my blog link below for the faster cook method I always use!). Reduce heat to 350 when the skin gives when you press on it. Remove threads into 8×8” baking dish and set aside (feel free to cut it open and let it cool while doing the next step). Place a large pan over medium heat. Brown sausage or ground turkey/chicken with onion. Saute in any other diced veggies. Add spaghetti sauce and seasonings. I also always add some nutritional yeast flakes to add a cheesy flavor. Add mixture to the 8×8 dish and mix well with squash. Add whisked eggs to dish and mix it all together until you can’t see the eggs anymore. I might sprinkle on a little more nutritional yeast flakes too. Place in the oven and bake 1 hour or until the top has slight crust and doesn’t give if pressed. Rest 5 min before serving. Makes 4 protein/veg servings.

Past blog to see my own attempt at this concept and how to save time when cooking your squash: http://www.wemeltyou.com/friendly-feasting-things-spaghetti-squash/

*As of May 2015, I’ve been researching no-sugar-added spaghetti sauces. It seems Ragu may have quit making theirs, unfortunately. Classico’s tomato and basil is no longer qualified, but they have two current options without added sugar: a roasted garlic and spicy red pepper sauce. The former is at the Bloomington Walmart and the latter is in Bedford but not here locally. I’m hoping this changes. Keep your eyes on labels and don’t assume ingredients don’t change! The sauce will have sugar grams in the nutritional info (naturally in tomatoes) but may not have sugar listed in the ingredients. Companies are sneaky about hooking us on a product, then randomly deciding to add sugar! Hunts makes a less exciting no-sugar-added option in a can.

Mexi Spag Squash Pie

MEXI Version!!!

I love Mexican food and once had cooked up a big crockpot of ground turkey with salsa and Mexican spices when I was in a hurry to have protein ready and on hand. I wasn’t sure how on earth to use it all up and decided to try it in this pizza pie recipe. I think I like it even better!

Follow the same recipe and process as above, but in the skillet cook:

  • 1 lb ground turkey/chicken
  • Diced veggies like above
  • 1 cup salsa and/or no-salt-added tomato sauce (add more as needed for sauciness!)
  • Mexican and other seasonings to taste: cumin, chili powder, cayenne, garlic, etc.

Add this mixture to the squash threads in the 8×8 dish, stir in the whisked eggs just like before, and bake. YUMMY!


I hope you enjoy this recipe as much as I do, and a big thanks to our General Manager, Trish, for first sharing it! This is definitely one of my go-to options for a DELICIOUS meal, plus I get to cook once and eat four times. If you come up with another version, let me know! Until next week, feast Italian, feast Mexican, and as always…FEAST ON!!!

~Coach Lauren

Friendly Feasting: Chicken Variations

Happy Friday, NGPTers! This week’s edition of Friendly Feasting is a little different than usual. When it comes to the sustainability of our nutrition plan, clients (or potential clients) generally have concern about one of the following:

  • Boredom with the foods / need more variety, to which I say…READ MY BLOG!
  • No time to cook or make different things, to which I say…here are some ideas!

Instead of a recipe I’m giving you suggestions on how to cook once, and then dress up a basic chicken breast. When you are ready to cook up a boatload of chicken to last you the week, trim off any visible fat then bake, boil, or grill. Cook as many as you think you (and your family) will eat in the next few days. Store the cooked chicken in air-tight containers in the fridge so they are ready to eat when you need them. Store excess servings in the freezer. Now, you have a meal base that you can jazz up to make a little differently each day. Check out these ideas and links to former blogs:

Spicy Peanut Sauce 2Chicken with Mustard Cream SauceBaked or Grilled Mustard Lime ChickenRed Curry Carrot SauceChicken Cacciatore 1Artichoke Tap w chicken

Save time and money buying in bulk:

Buy a couple large packages of chicken breasts when they are on sale. Trim off excess fat; then, baggie them up into various portion sizes. I might make a few baggies with 1 chicken breast each for a single meal for myself, some with 2-3 breasts for cooking for a group or making a larger dish/soup, and a baggie or two with 1-2 diced chicken breasts so they’re already prepped and ready for a stir-fry, soup, or recipe calling for such. This is also the time to throw in lemon or lime juice and spices or other meltdown-friendly marinade into one or more of the baggies that you will be using in the next day or two. What I won’t be using soon, I put in the freezer. Pulling out a single baggie to thaw as needed saves time in thawing the meat and decreases prep time so that dinner is on the table faster!

I hope this blog gives you some peace of mind about cooking, variety, and plan sustainability. Do you have a fabulous way to top or use a basic chicken breast? Let us know on the NGPT Facebook page or current bootcamper Facebook page, or email me! Meanwhile, feast with chicken, feast with variations, and as always…FEAST ON!!!

~Coach Lauren

Blender Waffles

Friendly Feasting: Blender Waffles

Every time I find a recipe with bananas, I do one of three things:

  1. Ignore the recipe because I hate bananas
  2. Ignore the recipe because we can’t have bananas
  3. Find a banana sub because I think the recipe is worth it

I’ve really started to enjoy the crispiness of waffles over the last few years, so I subbed canned 100% pumpkin puree in this recipe. Unfortunately, Primers can now have bananas, but not oats. Sorry guys – something to try post-bootcamp, perhaps!


Blender Waffles http://vegweb.com/recipes/blender-waffles-rolled-oats

  • 1 cup rolled oats
  • 1 cup water
  • ½ Tbsp Splenda
  • ½ tsp vanilla
  • ¼ tsp salt
  • ¼ cup pumpkin puree

Preheat waffle iron according to manufacturer’s directions. Combine all ingredients in blender. Blend until smooth. Pour batter into waffle iron. Cook according to directions. Makes 2 carb servings. Consider adding cocoa, cinnamon, or other extracts/free flavorings in addition to or in place of the pumpkin. Add a couple scrambled O3 eggs and breakfast is served!


Tada! A Meltdown-friendly waffle! Perfect for Level 2’s 2-carb meal on Day 1s because you could have this whole recipe to yourself! Feast crispy, feast from an iron, and as always…FEAST ON!!!

~Coach Lauren